Monday 12 December 2016

Some Thoughts on the Highland Way of War

Every now and then there is a discussion on the Highland Charge.  Ethnic tropes and bad history are given an airing, quotes are used without context and people pick their side and dig in for the duration.  Much heat and little light is generated.


I’ve been thinking about the Highland Charge and Highlanders at war in general. Let’s start by considering this view from a military man who saw the real thing in the ‘45. 


“(people) that knows the Highlanders…whose way of fighting is to go directly sword in hand at the enemy…any man who has served with the Highlanders knows that they fire but one shot and abandon their firelocks thereafter.  If there be any obstacle that hinders them going on the enemy all is lost.”


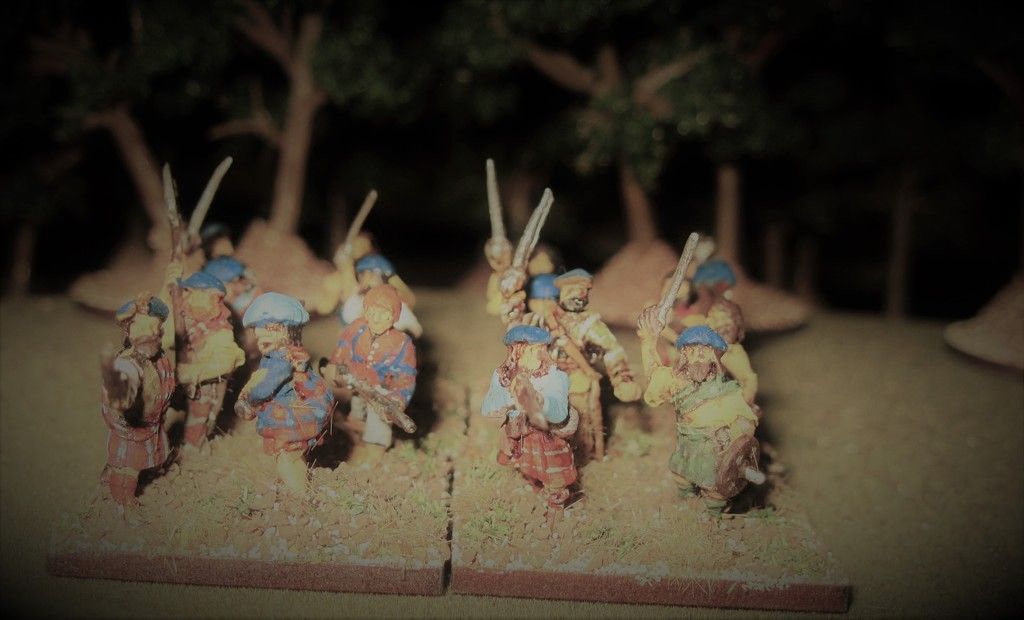
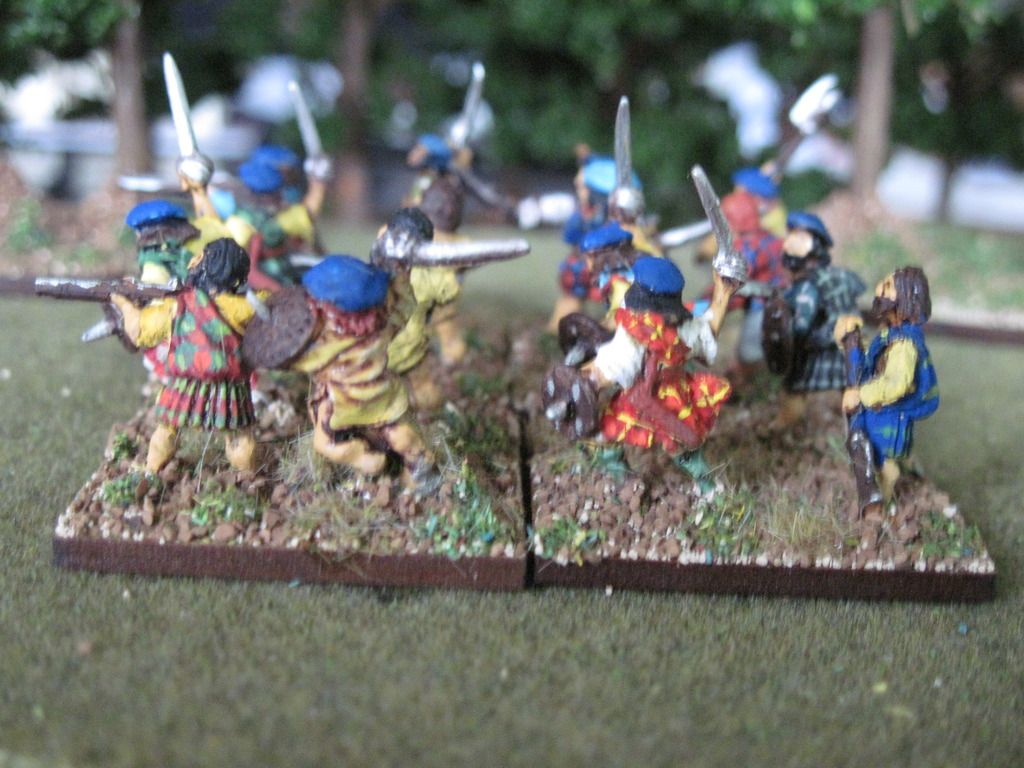
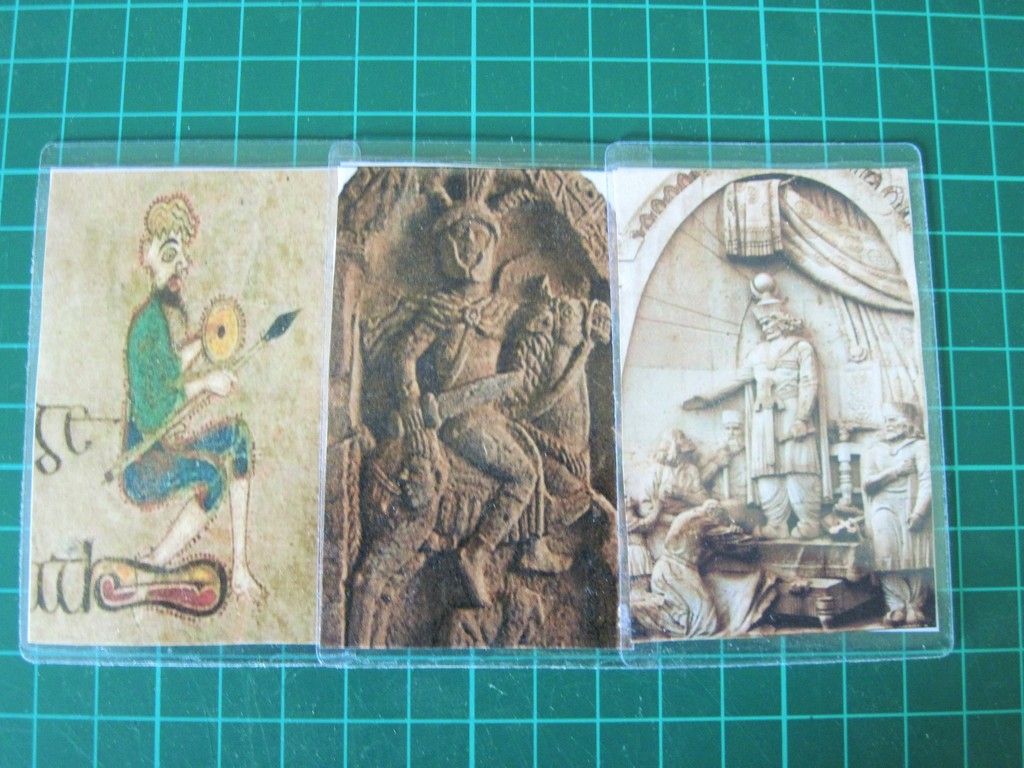
O’Sullivan here is talking about the Highland charge. Should the Highlander make contact he crouched behind his targe, brought his sword edge into play and pruned his opponent by lopping off extremities. The heavy basket hilts and a circling motion brought additional weight and velocity to the blows.  The impact was of course horrific for those on the receiving end.  


The charge was delivered in formation, three ranks deep with the leading men covering the followers, and at speed.  The spacing was important both to reduce casualties from incoming fire and to allow each man enough space to fight effectively once the charge went home.  As Jim comments below care was taken to maximise the advantage of ground.

The charge failed at Culloden not least because of the unsuitable ground and resulting overcrowding of the clansmen.

So we can see that the Highlanders actually needed good ground to deliver their particular brand of martial magic to good effect.  Significantly a generation later and a world away Highland charges in the Mohawk Valley always failed.


Little attention is given to missilery despite it being an integral part of the Highland military doctrine.  The hunting Highland gentry tended to be be good shots with lots of practice behind them.   When facing formed regular troops they liked to try and provoke an early volley from their opponents by potting a few. If they succeeded they could charge in relative safety.  What they could not do was match the rate of fire of regulars and wherever possible they tried to avoid such contests.


Why men so famed for their close fighting should emphasise missilery is interesting to consider.  I take the view that it stems from the Viking influence on the Isles and adjoining mainland Scotland and that it was an integral part of the Highland military tradition. 


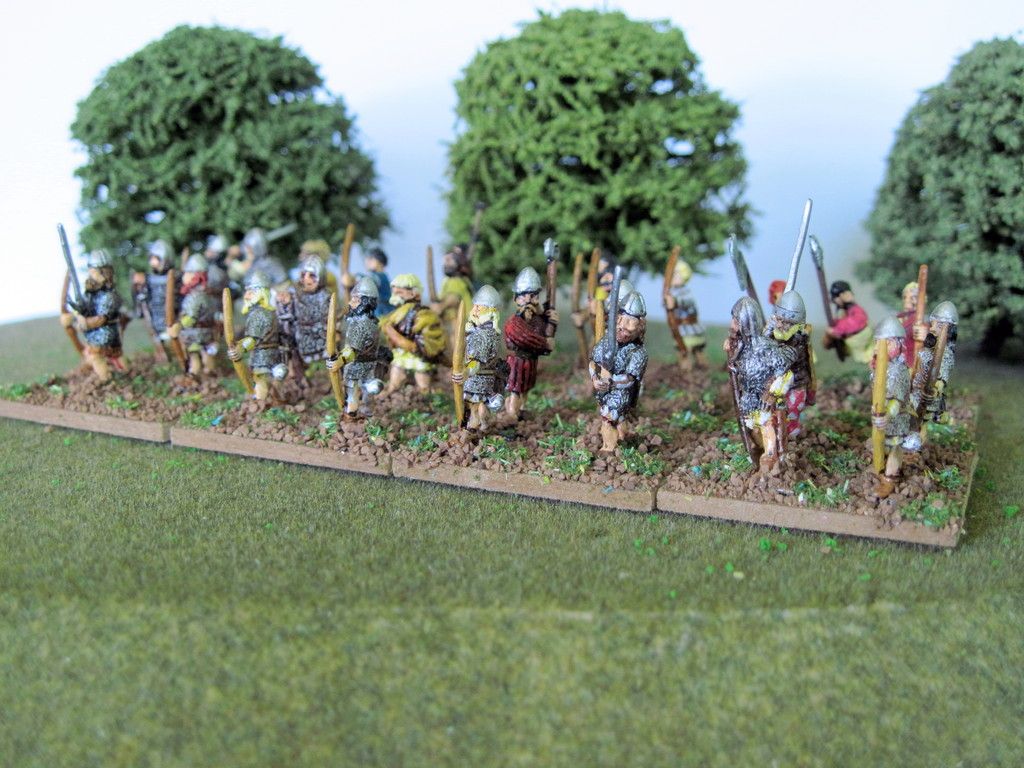
Troops from the Highlands and Isles on the evidence of records of their battle performance in the Nine Years War in Ireland were bow and sword armed high quality assault troops. Like the Irish they quickly took up firearms which pretty much takes us to the popular image of the Highlander.


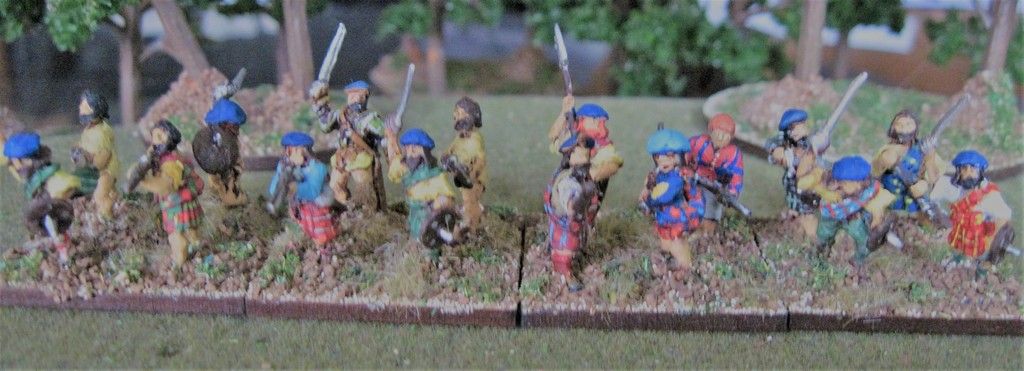
I'm minded to model the foregoing by giving the Highlanders a high fire effectiveness but a low rate of fire and once a charge has taken place no firepower at all. 

Friday 9 December 2016

More for the Carlist War

There is apparently a delay at the Designer’s end in the next tranche of QRF Carlist War figures although some of the new models have already arrived. While I wait with no little anticipation I am pressing on with what I have to hand. 

A base of QRF Centre Company Cristinos.  You can see why I’m so keen to see the new releases. 


More Carlists here. 


Here we have Brigadier Charlie FitzGerald with some BAL Rifles.  He seems to have added a non- regulation green plume to his hat all the better to get the Munster boys to charge entrenched positions.


Below these Old Glory Mexicans are standing in for the British equipped Chapelgorri in their distinctive red Shakos. Barring the non -Spanish cartridge box they are a good match.


More Carlist War stuff as soon as it arrives.

Thursday 8 December 2016

Scotland Is the Key

Or so many of King James the Second’s commanders believed.  Certainly, had he secured Scotland and struck for Newcastle to indict the Coal Trade Prince William might have gone home to think again.  As it was James didn’t concur and William conquered the islands.  It is a great ‘what if’ though and one I intend to get around to next year.


All the regular soldiers here are from Irregular and the Highlanders are from a wide range of manufacturers. 


A Williamite Regiment above and a Jacobite one below.


The pics are taken in artificial light with a flash and honestly don’t do justice to the figures. The flags are a mixture with at least two of them from Ray at Don’t Throw a 1.  If you are interested in the Wars of the League of Augsburg check out his blog.


Monday 21 November 2016

Better Late Than Never

About 7 years ago there was a flurry of excitement among C19th Wargamers as the Carlist War hove into view in the form of some excellent figures from the Perry Brothers and a first class supporting book from Conrad Cairns.

In my time, I’ve thrilled at the sight of the Rias of Galicia, poured Cider libations in Asturias and delighted in the Basque country but it was all 28mm and so it passed me by.  Until now that is.

A couple of weeks ago I noticed QRF had produced some 15mm figures for the First Carlist War.  I enquired about the new range and Chas told me

 “We intend to have the Cristino command – and flank Companies, in production within a fortnight.  These will be followed by Carlist infantry.  The intention is to have a range similar to the old 28mm rang that we used to make some years ago, so we will be doing French and British Legions, plus cavalry and artillery and possibly the Portuguese too.”

As a 15mm gamer you could not ask for more and I know from experience QRF always deliver so no fear of half completed armies. I ordered some figures and you can see some of them here.


I also bought the Cairns book from the Perry’s-great service and a fair price. The book is just what’s needed for anyone coming new to the period.


I also had a poke about the Bits Box and assembled enough figures (Black Hat) to make up three Cristino battalions.  You can see one of Cazadores here.


Finally, I ordered some British from ERM for the Irish Brigade of the British Auxiliary Legion. You can see one unit of them here.


The flags shown are all from Steve at http://balagan.info/wargaming-flags-for-the-first-carlist-war who kindly makes them freely available.

All in all, a good start I think.


Tuesday 15 November 2016

The Next Play Test

As you know I was happy with the last play test of At the Ends of Empire but I feel the need to try the mechanisms further before I’m fully satisfied.

The next play test will be another away game for the Romans this time against Sasanian Persia.  Getting a grip on how Persian armies worked is a bit tricky as academic opinion varies and changes.  Some things seem clear enough we are certainly talking about major missilery and lots of armour, more in fact than the Romans, nor were the Persians afraid of close fighting.  They also had elephants which the Romans loathed. 


To this we can add large numbers of very agile horse archers recruited from the nomad population of the Persian Empire.


The Persian cavalry had the edge on their Roman counterparts until the latter adopted the Hunnic bow and up armoured.


The Roman infantry was good and seems to have thought nothing of attacking the Persian cavalry.  The Persians had some good infantry but mostly they were not fit to stand up to the Legions in a close fight.


I’m inclined to think this should be a big battle with lots of troops on the table.  More soon.

Monday 7 November 2016

Reflections

The purpose of a play test is to see how things work or don’t, as the case might be.  So how did it go?

Most pleasing for me was that the Drungus and Chariot rules worked, the latter less spectacularly than I might have wished, but it seamlessly delivered both a missile platform and battle taxi.  

The Drungus showed its strength, and the reasons for its longevity, when an unarmoured unit of Roman cavalry sent twice its number of Pict spear men reeling back at no loss to itself.  It showed its weakness when the same cavalry got emmeshed in a second group of Pict spearmen and lost half its fighting strength.

The Legions did what they were supposed to do and routed everyone in front of them-but they were trained and armoured and fighting unarmoured part timers.


Unarmoured Roman close fighters didn’t do as well but could still take on greater numbers and if not prevail at least hold their own.  The artillery wasn't ready but it will be there next time.


Archery worked but unarmoured archers were vulnerable to both Missilery and Melee.
Armour and luck allowed the Roman cavalry survive against twice their number of equally well motivated and skilled but unarmoured, and in dice terms unlucky, Drungus using Pict noble cavalry. I’m comfortable with that level of combat uncertainty.

The Picts won in terms of holding the field and achieving their own pre-declared battle objectives but they lost two units and had the Romans not ran out of steam (Army Morale Points) would have lost more.  

The terrain fought for the Picts as it should for any competent defending force.

Leaders had to work to keep their troops fighting and surprisingly none of them were killed.

The Romans did not lose a single unit but might have lost the Army had they continued beyond their last Army Morale Point.  As it was, a despatch home might have said something like “I Remain in the field having inflicted losses on the enemy”.


I’m happy with At the Ends of Empire so far, but the true test will be a much bigger expedition into Persia against a very different enemy.


Thursday 3 November 2016

End Moves

To continue with the Picts where we left off.

Card 3 Lull- no action. Card 4 Melee- Casno’s spear men wreak havoc among the embattled Roman cavalry causing shock and heavy losses before they can get out of contact. Fighting continues in Pict Centre with no clear advantage.
Card 5 Missilery- the Pict archers shoot at the retiring cavalry to no effect but the Roman archers receive sufficient casualties to drive them out of the line of battle leaving them in shock. The charioteers hurl javelins at the agile Roman cavalry who escape harm. The Pict cavalry have more success driving their opponents back with loss.
Card 5 Army Morale- no action. Card 6 Group Move- The Pict cavalry renew their assault the charioteers dismounting to fight at close quarters but the Romans grimly hang on.


Army Dice: Rome 2 v Pict 4. Two cards in play.
PictsCard 1 Command- an attempt to rally the routing Pict war band fails. Card 2 MissileryPict shooting causes the retiring Roman archers to move out of bow shot.


RomeCard 1 Melee- the Romans play their last Tactical Advantage Card and their cavalry drive back the Pict cavalry and turn on the charioteers, in the centre the melee continues. Card 2 Artillery- no action as it is not with the army.  


Army DiceRome 12 v Picts 4. 

Eight cards in play. RomeCard 1 Group Move- the Legions roll high and even and hit the flank of the Pict Centre inflicting losses and driving their opponents out of position.  


Card 2 Command- The Romans have half of their units near to breaking point and need to rally and recover unit integrityFalco begins and rallies his cavalry losses at the cost of 2 Army Morale Points. Another Roman cavalry unit is rallied at a cost of 2 Army Morale Points.  Card 3 Army Morale- no action. Card 4 Missilery- no targets. The Romans have no cards left unturned so both sides reshuffle their decks and a new turn begins.

Army DiceRome 9 v Picts 8.  Rome: One card in play. Card 1 Group Move. The Roman Centre advances, the archers shoot to no avail, one unit slaughters the Pict archers but the other is badly beaten by the High King’s warriors losing the last 2 remaining Roman Army Morale Points.  The Army must now disengage. 

Monday 31 October 2016

Part 5 - Hand to Hand

The Romans get to turn 8 Cards and in order to maximise their chances will spend Army Morale Points where ever possible to inflict maximum damage on the more numerous Picts.  Doing so is a gamble but the commanders think it is their best hope of victory.

Roman: Card 1 Move- Poor dice for the Roman Centre and cavalry, there is not enough movement to reach the enemy so they remain in position. Marco rolls high and even, his cavalry forms Drungus and storms uphill into Casno’s fresh war band but comes unstuck and is held in melee.

Card 3 – LullCard 4 Army Morale – no action. Card 5- Manoeuvre- no action. 

Card 6 Move- This is what the Roman General has been waiting for.  Falco’s troops rush the Pict centre but one Roman unit is driven back by archery. The other makes contact but is held by the Picts who enjoy the advantage of numbers and ground, Falco’s archers shoot into the Picts Shocking them.


The Legions roll high and even and turn to face and then assault the two Pict War bands that form the link between the Pict Centre and their flanking cavalry.  They throw their spears before contact routing one unit and driving the other into the safety of the forest.
The Roman cavalry roll low and don’t move.  Card 7- Manoeuvre, no action.  Card 8 Command – Falco rallies his unit.


PictsCard 1-LullCard 2 Move. The Pict cavalry rolls high and even and envelops their Roman counterparts. The melee begins with missilery with both sides playing Tactical Advantage Cards and Army Morale Points for Specialist shooting. The Romans are outnumbered two to one and suffer the most losses but manage to drive back one of the Pict units.  The other Pict commanders roll low and cannot usefully move. The Picts have six cards left to play.  


More soon.

Sunday 30 October 2016

Part 4 – The Crisis of Battle

Picts: Card 1- Missilery No targets, Card 2 Melee-no contact, Card 3 Move The remaining Pict cavalry move out to form Drungus. Card 4 Melee-no contact. Card 5 Command, Casno fails to rally of the Unit Integrity losses from his warriors. Card 6 Manourvre -no action. Card 7 Lull- no action.

Army Dice: Rome 10 v Pict 5. Five Cards in play.

Rome: Card 1- Missilery. The Romans pay 1 Army Morale Point for Specialist shooting against the Centre Pict Warriors causing them to become shocked. Card 2 LullCard 3 Missilery. The Romans pay 1 Army Morale Point for Specialist shooting against the shocked Pict Warriors causing them to retire out of range.  Card 4 Manourvre- no action. Card 5 Command- no action.


Army Dice: Rome 10 v Pict 5. Five Cards in play.

Rome: Card 1- Missilery. The Romans pay 1 Army Morale Point for Specialist shooting against the Centre Pict Warriors causing them to become shocked. Card 2 LullCard 3 Missilery. The Romans pay 1 Army Morale Point for Specialist shooting against the shocked Pict Warriors causing them to retire out of range.  Card 4 Manoeuvre- no action. Card 5 Command- no action.

Picts: Card 1 Command. Casno finally fully rallies his battered war band paying 1 Army Morale Point. The High King rallies his shocked men and leads them back into the battle line. Card 2 Manoeuvre. On the other flank the Picts align themselves with the legions open flank. Card 3 Amy Morale – no action. Card 4 Move. The Pict cavalry out flanks their Roman equivalents and the archers move into range. Card 5 Manoeuvre- no action.


Army Dice: Rome 10 v Picts 2. Eight Cards in play.

The Romans now have all their forces in position and having seen the totality of the Pict army are about to launch a ferocious offensive.  The Picts have made the best of the terrain and their numbers and if they can hold the Romans they might win. This is the crisis of the battle.

More tomorrow and thank you for reading.

Saturday 22 October 2016

Part 3

Army Dice Roll Romans 7 v Picts 1.  Six Cards in play. Romans: Card 1- Manoeuvre-no action. Card 2- Command, archers rallied but the lost Unit Integrity remains. Card 3 Melee- no contact. Card 4 Artillery reload- no artillery. 

Card 5 Group Move, the cavalry, winning on even, form Drungus and move out to mark their Pict opponents. Card 6 - Army Morale- no action.


Picts: Card 1- Lull- no action. Card 2- Move-Casno moves his weary warriors out of the front line into the woods and brings forward another unit. The Pict archers retreat behind their spear men.  The High King moves to the Pict centre. The Pict cavalry form Drungus and the chariots appear. Card 3 Melee-no contact. 

Card 5-Missilery reload, the archers reload. Card 6- Command, Casno fails to rally off lost Unit Integrity from his battered war band.


Army Dice roll Romans 11 v Picts 4.  Seven Cards in play.  RomansCard 1- Lull-no action, Card-2 Army Morale-no action. Card 3- Melee-no contact. 


Card 4- Move, The Roman flank cavalry roll low and so choose not to move. The Roman Centre crosses the boggy ground. The Legions roll high and even, changing formation and moving to secure the open flank. Card 5 - Melee- no contact. Card-6 Command- Some of the archers lost unit integrity is recovered. 

More next week and thanks for reading.

Friday 21 October 2016

After a little delay we continue.

After a little delay we continue.  Army Dice Roman 6 v Pict 1-. Five Cards in play. 

Card 1- Move, On the Roman Right the Commander throws low but manages to get the slingers out of contact with the Picts. In the Centre poor dice prevent movement. The Legions move up. 

Card 2-Lull-no action. Card 3-Army Morale- no action. Card 5-Manouvre, The Roman Centre forms up in two deep units each flanked by a deep unit of archers in preparation for assaulting the Pict archers. The slingers retire through the cavalry. 

Card 5- Move, On the Left the Roman commander throws even on a winning dice.  His cavalry, in Drungus, assault Casno’s Picts on a roll of 12 to 3.  The Picts are sent reeling back, Shocked and with many casualties.  The flank of the Pict archers is now uncovered.


The Picts: Card 1- Group Move, The Pict cavalry moves out on the Roman flank. 


Card 2-Lull- no action. Card 3 Command, The High King rallies Casno’s men but fails to restore all of their lost unit integrity. Card 4 Chariots reload- no action. Card 5 Army Morale- no action.

Army Dice Roman 2 v Pict 6-. Four Cards in play. Picts: Card 1- Lull- no action. Card 2- Command, a failed attempt to restore all of the lost unit integrity of Casno’s men. Card 3-Missilery, three units of Pict archers each shoot twice at their Roman opponents.  


One Roman unit is forced out of the battle line taking many casualties and becoming Shocked. The other Roman unit is also Shocked. Card 4-Melee-no targets.

We’ll the battle’s developing and both sides are bearing up to some heavy blows.

Casno and his lads will need a lot of luck to stand another cavalry attack. 


The next installment is tomorrow by which time we’ll know his fate. Thank you for reading and I hope you are finding it as enjoyable as I am. 

Apologies for the late arrival...

Sorry folks I'm having difficulties in uploading photos and so the play test is delayed.

Please bear with me.

Thanks.

Thursday 20 October 2016

And We’re Off!

The Romans being Comitatenses have a higher Army Dice (D12) than the defending Picts (D8) and throw a 10 versus 2. Therefore 8 Cards are in play with the Romans going first.

Card 1-Lull-no action, Card 2- Army Morale-no action, Card 3 Melee- No troops in contact, Card 4 Command-no action.

Card 5 Move- The Roman Left moves up to sling range, its cavalry forming Drungus. The Roman centre first line moves forward stopping when it reaches some boggy ground.   The Legions in the second line slowly move forward (bad movement dice).  The Roman right flank cavalry hold their position covering the army's flank.


Card 6 Melee- No troops in contact, Card 7 Command-no action.

Card 8 Missilery- The Roman slingers shoot twice at the Picts shocking the leading group of warriors.  In the centre both units of Roman archers shoot twice at their Pict counterparts causing one unit of Picts to become shocked.

Picts: Card 1 Command- The Pict leaders successfully rally their shocked troops. Card 2- Manoeuvre- no action. Card 3 Army Morale- no action. 

Card 4- Move- Casno commanding the Pict Left throws his Leader Dice in the hope of being able to charge and melee with the Roman slingers, he rolls poorly and on an odd number so can only move into contact. 


Card 5 -Manoeuvre-no action, Card 6- Lull-no action. Card 7- Move-no action.

Card 8- Melee- Casno’s warriors attack the Roman slingers who fight back with sword and buckler. Poor dice scores (3 Pict-2 Roman) results in one hit per side but the Picts hold the advantage.


So far, so good I think.  There are a few things to note.  The Roman missile troops are Specialist for Shooting but their commander thinks it wise to hoard his Army Morale Points until he can see the full size of the Pict army.  The Roman slingers, plucky lads though they are, have been very lucky and need to get out of the way of that Pict war band. We can also note that the Pict archers are holding their fire for maximum effect.

More tomorrow and thank you for reading.

Wednesday 19 October 2016

Just a note before we get into it

Just a note before we get into the play test. 

The Romans are on a punitive expedition.  They intend to destroy the Pict army and then kill and burn every living thing they can find. This was standard practice on the Imperial frontier and seems to have happened about once every 25 years.

The Roman force is drawn from the field army and has 3 units of cavalry, two Legions and supporting troops, ten Comitatenses units in all 5 of which are elite.  There are four Roman commanders, the Romans have a total of 22 Army Morale Points.


Now to see if any additional Army Morale Points are available to Romans. The Romans throw two ones and so their total remains the same at of 22 Army Morale Points.  They will have to rely on superior equipment, training and command against the more numerous Picts

Friday 14 October 2016

The Picts Are Ready - Tactics

The Picts have mobilised against a Roman incursion.  To maximise their chances, the infantry has formed in Big Units the better to absorb punishment.  Every effort will be made to make best use the ground to disrupt and slow the inevitable Roman advance.  


Once the Romans are committed against the spear men the Pictish cavalry will launch a hopefully irresistible flank attack.  


The aims of the Kings of the Picts are to halt the Roman advance and preserve the army for future engagements. The Picts have 4 elite units and 5 leaders and 14 units of warriors giving a total 28 Army Morale Points.


To see if any additional Army Morale Points are available the Pict player rolls a D6 versus a D12.  He throws a 5 v an 8 and so adds 3 additional Army Morale Points to their total making a grand total of 31.  

Friday 7 October 2016

The Card Decks

Here are the Cards for At the Ends of Empire as you can see there are three Roman armies to reflect the Empire's options for dealing with opponents. All armies have the same number of cards but not all the same type of cards so we will see Persian arrows blocking out the sun and Celtic chariot warriors racing to death or glory.  I'm still thinking about British, Germanic and Hunnic Cards but they will follow in due course and benefit from the lessons of play tests. 


Card
Action
Pict at Home
Army Dice D8
Irish or Pict Away or
Limitanei
Army Dice D10

Sasanian
Army Dice D12
Comitatenses
Army Dice D12
Palatinate
Army Dice D12+1
Army Morale
Army Morale check
3
3
3
3
3
Artillery
(Only loads with this card)
Artillery is loaded
-
-
-
1
1
Command
Commanders can move and rally
3
4
5
5
5
Lull
No action
5
4
3
3*
2
Manoeuvre
Change formation or facing
3
3
3
3
3
Move
Troops can move
3
3
3
3
3
Group Move
One command can move
1
1
1
1
1
Melee
Troops can melee
3
3
3
3
3
Asavaran
Missilery
Asavaran are loaded
-
-
2
-
-
Missilery
All missile troops are loaded.
3
3
3
3
3
Chariot Missiles
Chariot troops are loaded.
1*
1*
-
-
-
Tactical Advantage
Up 1 Dice size for any action
2
2
2
2
3
Total

27
27
27
27
27

Here are some of the Card images.


After some indecision I went with an Irish image for the Irish/Pict 'away' deck .  This was because the warrior seems to have limed his hair which is very suggestive of a very old Celtic practice that interests me- and it is a colourful image. I will probably do a separate Pict 'at home' deck as well.  Anyhow I'm pleased with them and I hope you like them too.